Identifying Notes On A Piano: Learn the Keys Visually
Okay, let’s get ready to take things one step further, and learn to recognize the notes on a piano on sight!
No more need for writing the note names on your piano in marker, or taping the names to the keys. Once we’ve gone through this lesson, we ‘re going to be able to identify the notes on a piano just by looking at them, without any extra help.
Last lesson, we learned the note names of all the white notes on a piano, and with some practice we’ll get to the point where we know all the names without even having to think about it. But meanwhile, we need a way to quickly identify the notes so that we don’t have to take twenty minutes every time we’re looking for a G note.
Obviously, there are both black and white notes on a piano. So far, we’re just focusing on the white notes, and the reason is that the best way to learn black notes is in relation to the white notes. Basically, if you know the white notes, it’ll be really simple to learn the black notes later.
The Two Zones
The first thing we need to do is break up our 12-note pattern into two sections, or zones. Once again, the black keys will save us here – as we noticed before, all along the keyboard there is a pattern of two black keys together, then three black keys, then two again, then three, etc.
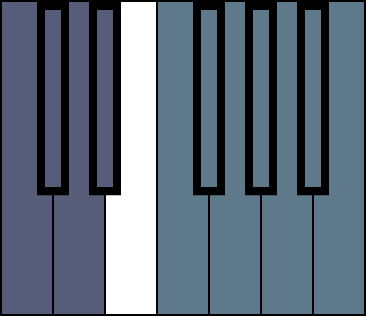
Using the black keys as landmarks, we can break up each 12-note pattern visually into 2 separate zones:
Zone 1: The first 5 notes of the 12-note pattern, which consists of the two black keys plus the white keys that surround them.
Zone 2: The last 7 notes of the 12-note pattern, which consists of the three black keys, plus the white keys that surround them.
It’s easier to see it than it is to read about it:
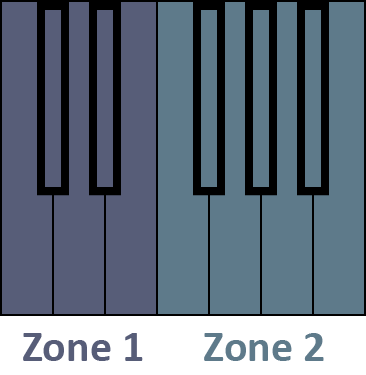
As we can see, Zone 1 is the section with the group of two black keys, and Zone 2 has the group of three black keys. Now that we’ve divided our 12-note pattern into 2 zones, we’re ready to learn how to “see” and identify the notes on a piano keyboard.
C
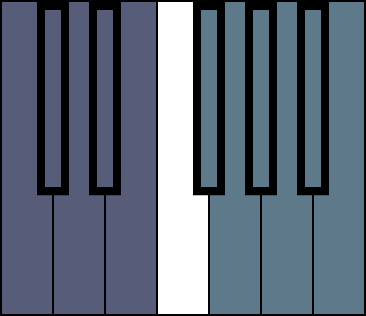
Let’s start it off with the first note in Zone 1, the note C (pictured in white):
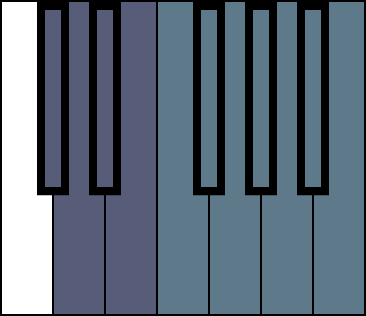
To find a C note, all we need to do is find any of the two black keys in a row on the keyboard (which is Zone 1, as we learned), and look for the white note in front of them, and that’s a C. Easy?
Also, take a look at the shape of the C key – notice how the lower part of it juts out to the right.
Try it out on a keyboard, if you have one available: See how quickly you can randomly play a C note anywhere on the keyboard, without making a mistake. Or try this game: close your eyes for a moment, open them, then reach out your hand and play the first C that you can find. Both of these are great methods to practice each new note we learn.
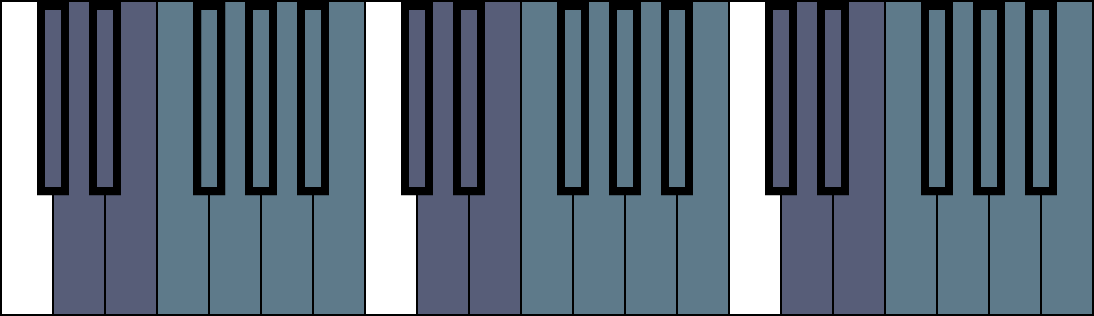
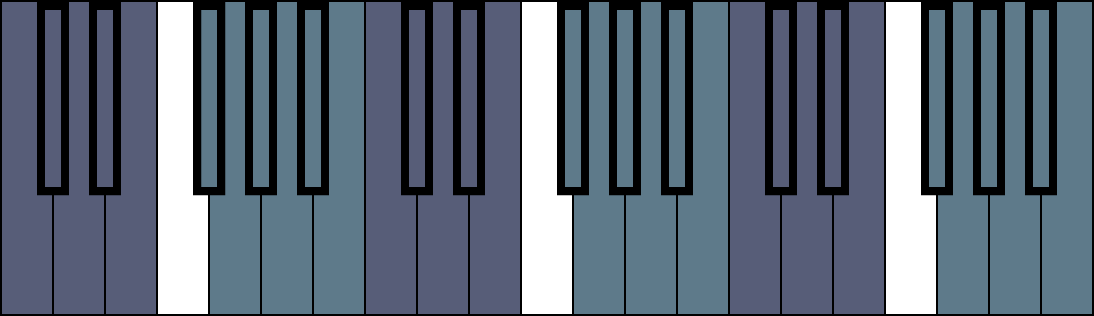
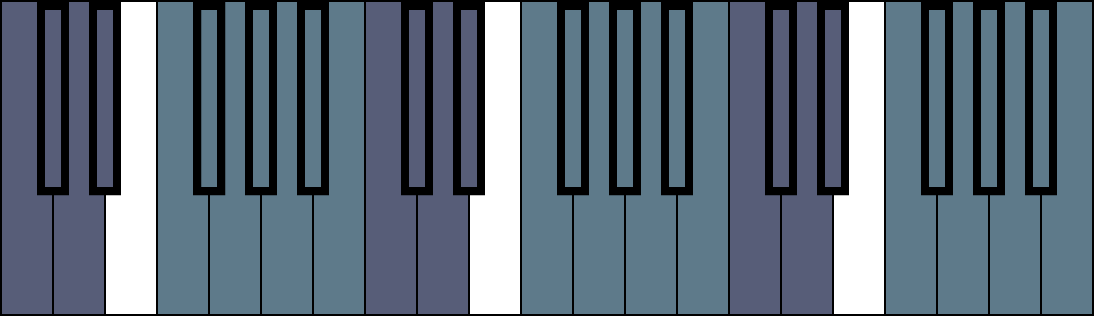
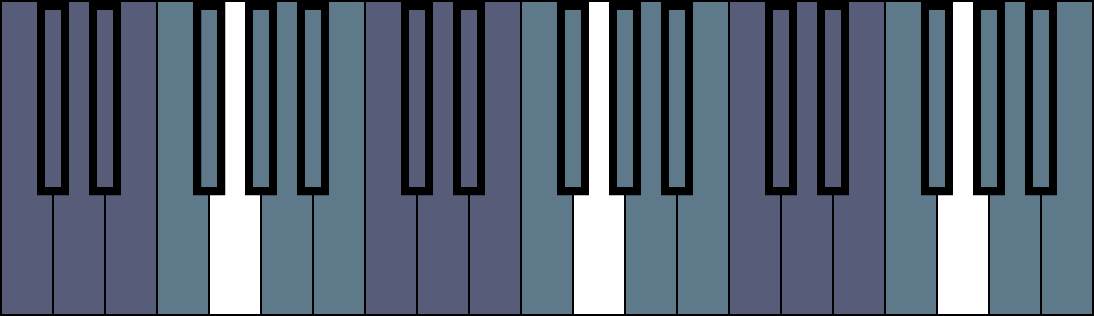
Here’s a picture of the all the C notes shown in white across three octaves:
F
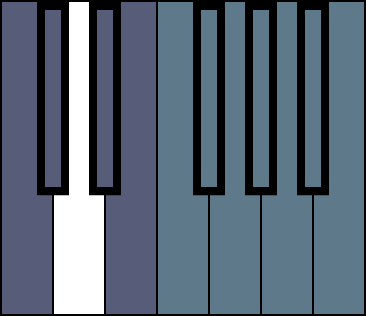
We switch over now to Zone 2, and introduce the note F (once again, shown in white). F is the first note in Zone 2:
The shape of the F juts out toward the right, just like C. The way to tell them apart is by using the zones; C is the first note of Zone 1, and F is the first note of Zone 2.
Practice with F just like we did with C. Try to pay close attention where each note is, what it looks like, etc., until you can find them more easily than your car keys (while you’re driving, that is).
D
Now let’s go back and finish learning the rest of the white notes in Zone 1. D is the middle note in Zone 1, right between the two black keys:
The D key is shaped differently than F and C; it is skinny on top, and the lower part juts out on both sides. This reinforces the fact that D is in the middle of Zone 1.
E
And we finish off Zone 1 with the note E, located right after the two black keys:
Another way to see it is that E is just to the left of the F note (which we learned earlier), with no black keys between them. Use whichever way works better for you to memorize where the E is.
As far as the shape of the note, the lower part of the E key juts out to left, exactly the opposite of C and F.
B
We’re going to turn our attention now to Zone 2. We already learned the first note of Zone 2, which is F. Now let’s introduce B, which is the very last note in Zone 2 (it comes right after the three black keys):
Just like E, the B key juts out to the left. Just remember that E is the last key in Zone 1, and B is the last key in Zone 2.
G
OK, great job! At this point, all we’re left with are G and A. These two notes are the two “inside” notes in Zone 2, right smack in the middle. All we have to pay attention to here is that G comes first (since it’s a lower note than A), so therefore G is on the left, and A on the right.
Here is G:

A
And here is A:
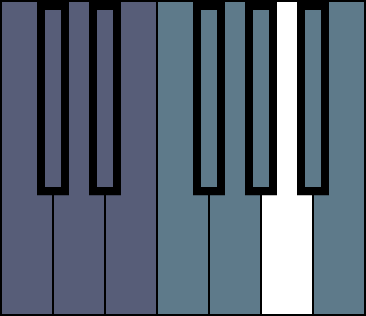

Notice how both G and A are surrounded by the three black keys, G on the left and A on the right.
Also, take a look at the shape of the G and A keys. You can see that just like the D key we learned earlier, both of these keys are skinny on top, and the lower part of the keys juts out on both sides. However, even though it is not clear from the piano diagrams above, on a real piano there is actually a slight difference between these three keys:
D juts out equally in both directions.
G juts out more on the right than on the left.
A is the opposite of G, jutting out more on the left than on the right.
Summary
So let’s quickly sum up what we’ve learned about identifying notes on a piano:
Zone 1 has 3 white keys, C, D, and E. C is on the left side, D is in the middle, E on the right.
Zone 2 has 4 white keys, F, G, A, and B. F is on the left side, B is on the right, and G and A are in the middle, with G to the left, and A to the right.
In terms of shape, we can basically divide the keys into 3 groups:
C and F – jut out toward the right
E and B – jut out toward the left
D, G, A – jut out on both sides
And that’s about all there is to identifying the white notes on a piano!
With some practice, you’re sure to improve at note recogniton quickly, soon being able to identify all the notes on a piano on sight. Thinking about it the way we’ve broken it down here will hopefully make this easier to achieve!
Practice Quizzes, Worksheets and Tips
Note Identification Quiz
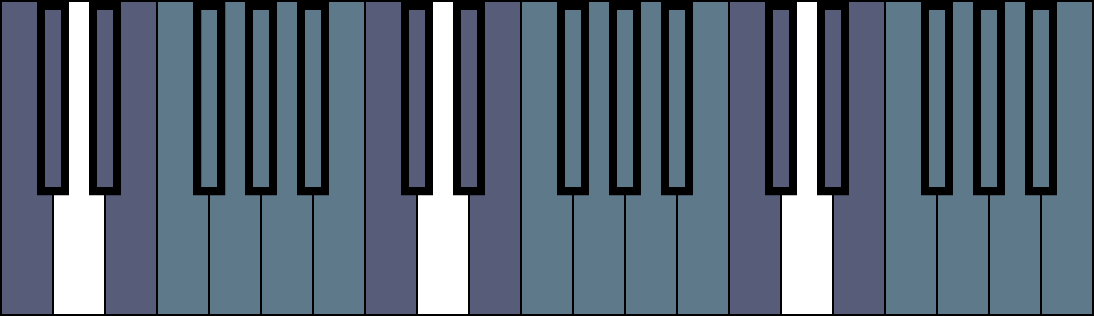
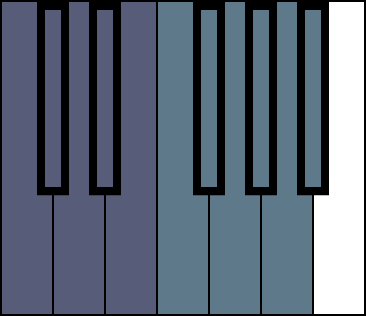
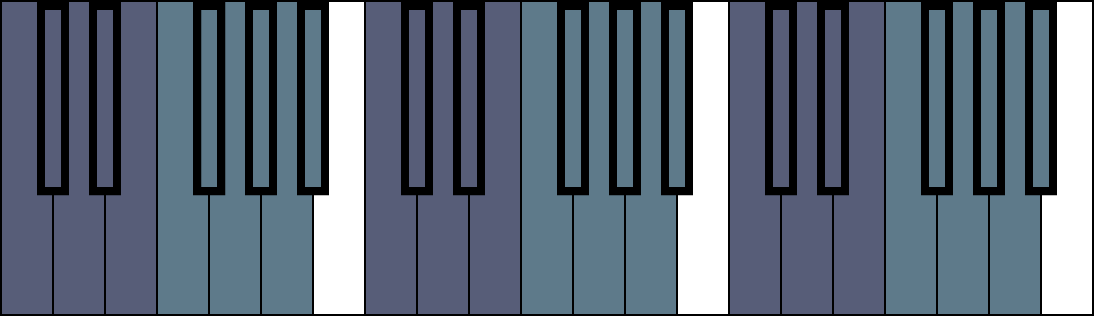
Identify the white, highlighted notes in each of the following images:
More Practice
1. Check out this Q&A to test your knowledge on this lesson.
2. Use these blank keyboard diagrams to practice identifying all the notes we’ve learned.
Practice Tips
Practice with each note by itself: try to picture it in your mind, then try to find all the notes that have the same name. For example, try to find all the G’s on the piano, then all the C’s, and so on. If you have access to one, try this on a piano or keyboard; otherwise, use the blank keyboard diagrams above.
Keep working on one note at a time, until you really get familiar with each one.
Image Attribution:
Old Piano Keys by Steven Depolo ©2011 CC by 2.0
practice makes perfect. by Jukie Bot ©2013 CC by 2.0